Jonathan Norman

Jon Norman is a garden designer based in the Midlands UK. With a wealth of knowledge on planting, construction materials and garden accessories, Jon creates stylish gardens which are havens for nature.
Bees Needs

Bees Needs

Planting for Pollinators

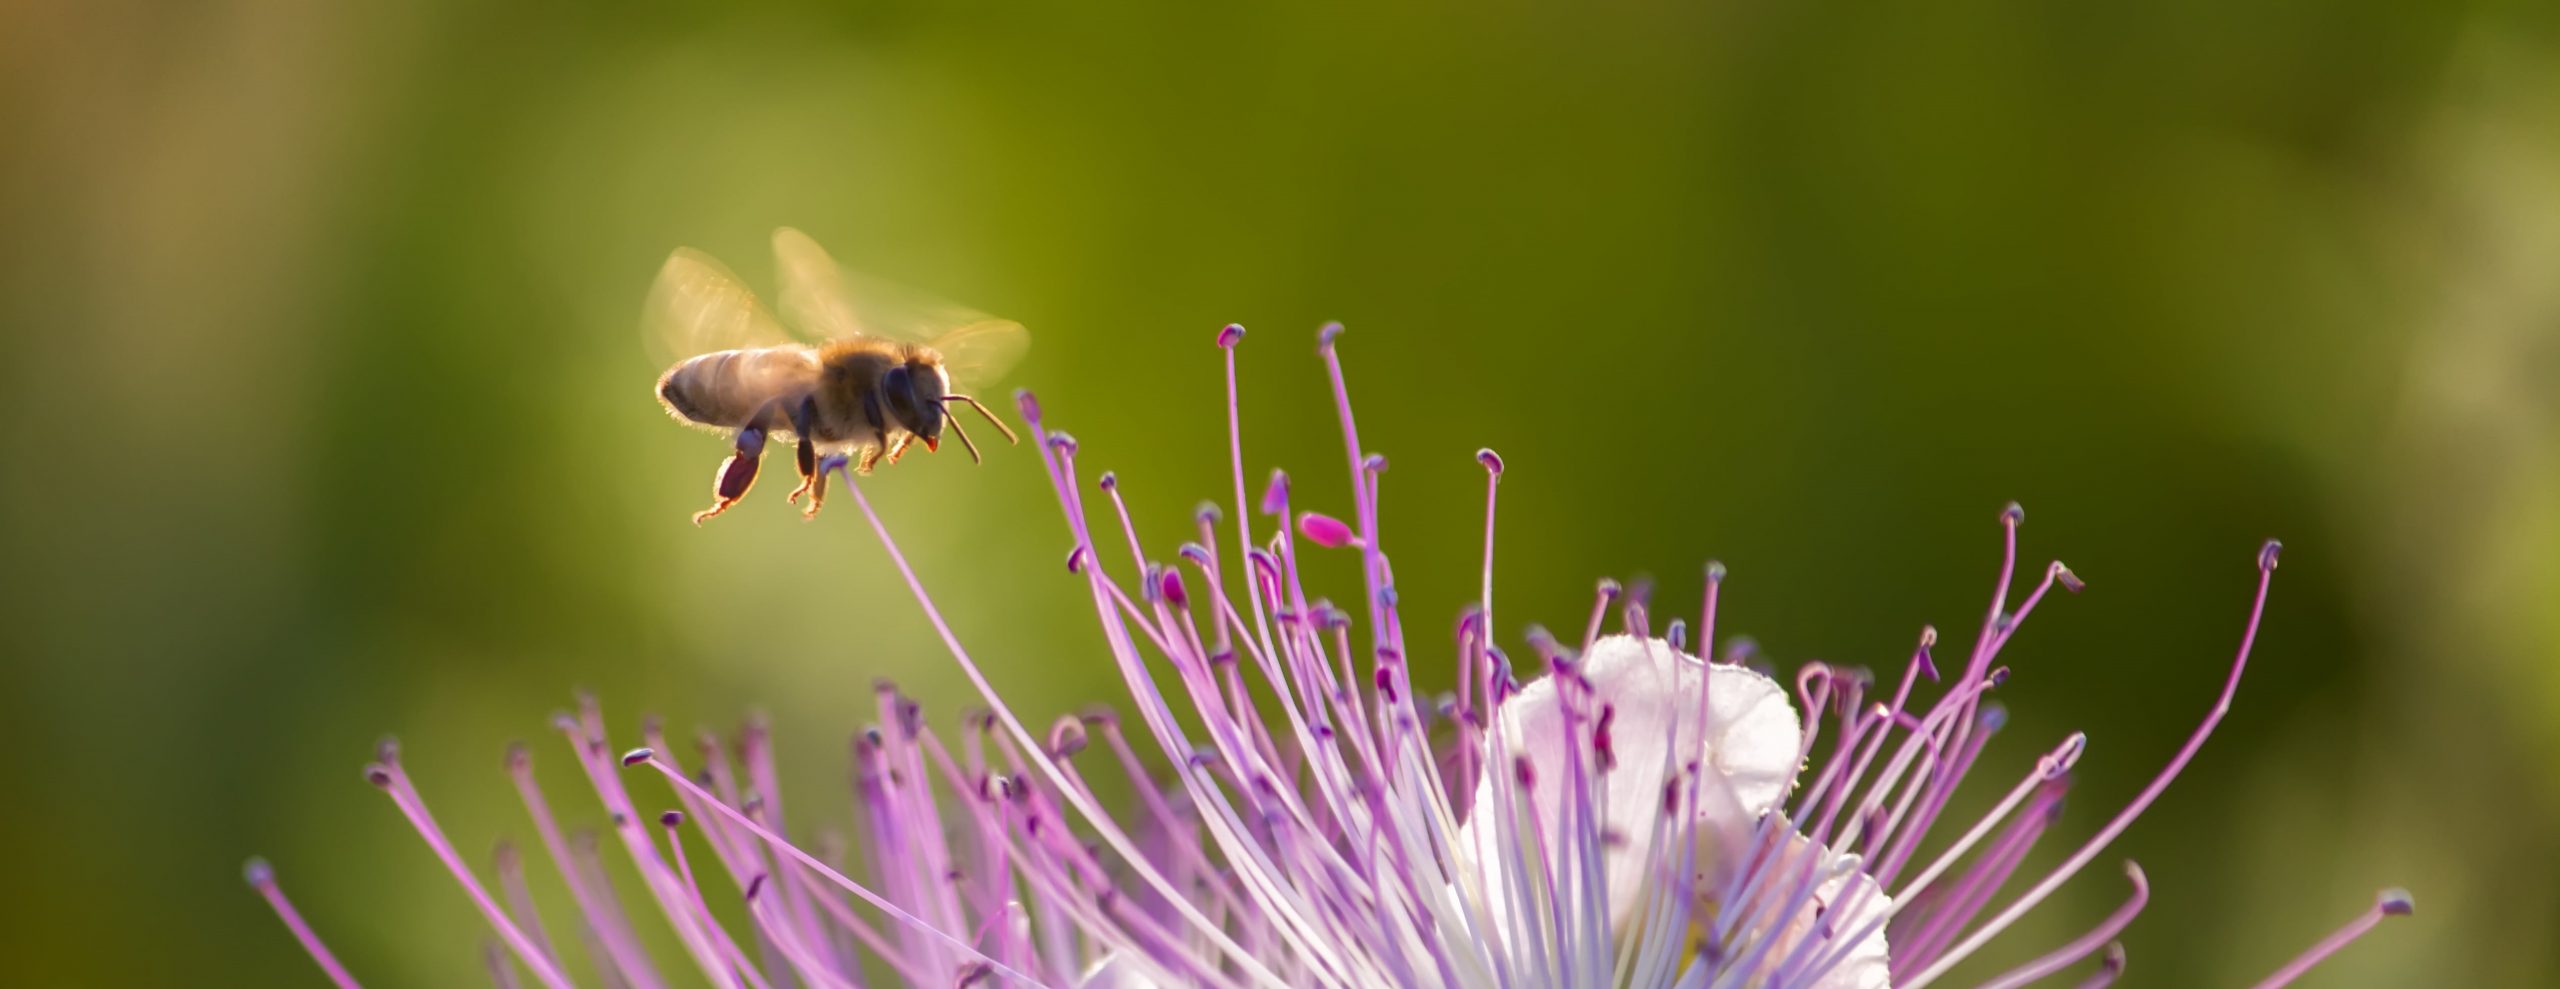
Bees and other pollinating insects are perhaps the most important animal for our own welfare on the planet.

Across the world, bees pollinate 80% of the world’s plants which includes 90 different food crops such as like cocoa, tomatoes, almonds, and apples. It is estimated that 1 out of every 3 bites of food that you eat is thanks to bees.

See the source image

Global Decline in Insect Numbers

Sadly across the world over 40% of all insects are now in decline with a third of those endangered. Analysis suggests a quarter of insects could be wiped out within just a decade. There are many factors which are contributing to this. Among these are:

  • Pollution,
  • Use of insecticides on crops,
  • Global warming and
  • Loss of habitat

It is loss of habitats that is probably the most concerning issue especially for rarer and more specialised insects. Urbanisation, deforestation and industrial expansion have fragmented the natural places where insects once thrived.

This is very noticeable in town and city environments where roadways, pavements and paved over front gardens limit the natural resources that allow bees and other insects to thrive.
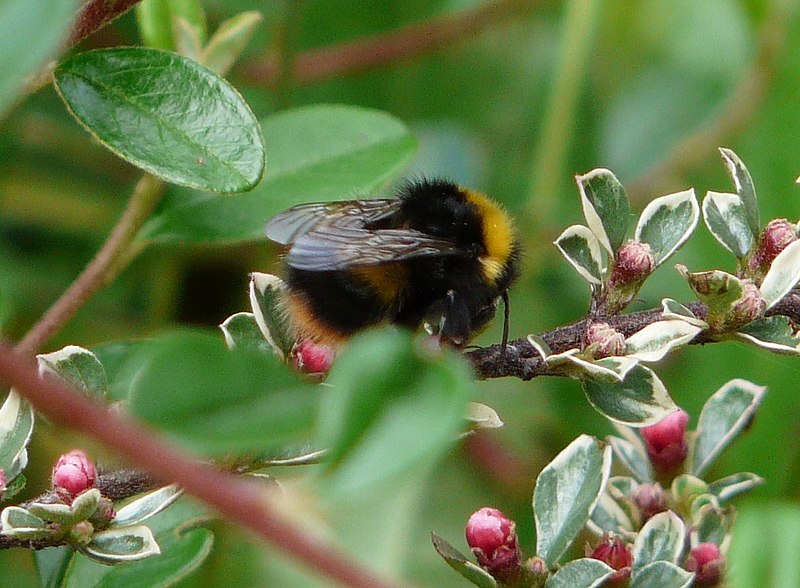
Gardening For Bees

All is not lost for our six-legged friends. With a little bit of help from the gardening community bees can thrive again, and what’s more we get to have the loveliest of gardens to view them in.

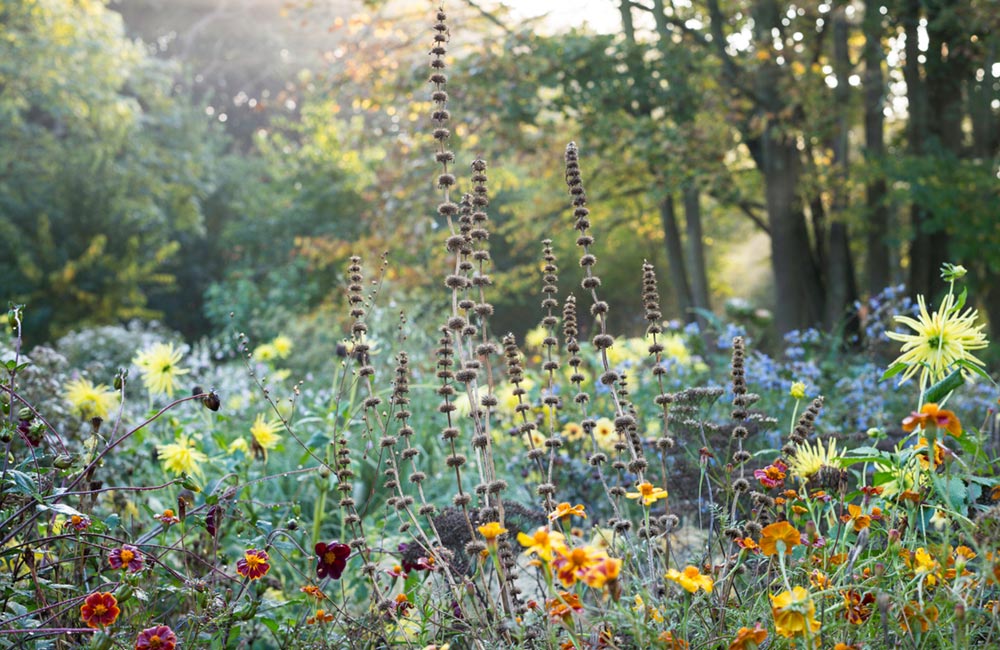
Here is a list of fifteen of the best plants you can add to your garden that will encourage bees and other pollinators. What’s more all of these plants are easy to grow, require minimal maintenance and look absolutely stunning in the garden border.

So what are you waiting for, pop some of these plants in the border to help the bees and at the same time you enjoy a beautiful summer display of flowers. It’s a win-win for them and us.

Achillea

  • Achillea millefolium (Common yarrow) is a perennial wildflower, typically found growing in grassland and roadsides. It has feathery, aromatic leaves and flat white flowerheads, which are attractive to a wide range of pollinators, notably hoverflies. Cultivated varieties come in a array of colours and heights.
  • Spread: 50cm
  • Height: 50cm
  • Aspect: Full Sun
  • Soil: Chalky, Loamy and Sandy

Flowering Period:

Agastache

  • Another fantastic plant loved by bees. Agastaches are perennials from North America, China and Japan, they grow in poor, soil and dry conditions. Perfect for gravel, Mediterranean or prairie gardens, they may also be grown in containers on a sunny patio or as part of a cottage scheme.
  • These are brilliant plants for bees. Grow Agastache in full sun and a well-drained soil and let the old flower spires remain throughout winter to provide interest. In colder regions, protect from frost.
  • Spread: 60cm
  • Height: 90cm
  • Aspect: Full Sun
  • Soil: Chalky, Loamy and Sandy

Flowering Period:

Alliums

  • Alliums are incredibly long-lived bulbous perennials which are loved by bees. Alliums look fantastic when planted in large groups and make excellent cut flowers.
  • Grow alliums among other low-growing herbaceous plants which will hide their unsightly strappy foliage after flowering. Let allium foliage die down naturally after blooming and consider leaving the flowerheads in place as they look attractive in their own right, particularly in winter
  • Spread: 15cm
  • Height: 90 – 150 cm
  • Aspect: Full Sun
  • Soil: Chalky, Clay, Loamy, Sandy (will tolerate most soil types)

Flowering Period:

  • Most allium varieties will flower for four to six weeks. By planting a succession of bulbs in your garden you can prolong the flowering period over several months. Click here and here for further details of what to plant when.

Astrantia

  • Astrantias, also known as masterworts or Hattie’s pincushion, are fabulous cottage- garden or mixed border plants with a range of different colours. Will grow in sunny and partial shaded sites and can handle moist soils, making them a valuable asset in any border.
  • Spread: 45cm
  • Height: 90 cm
  • Aspect: Full Sun, Partial Shade
  • Soil: Chalky, Clay, Loamy, Sandy (will tolerate most soil types)

Flowering Period:

Camassia

  • Camassias come from North America and are sometimes known as wild hyacinths. They’re very striking plants when in flower, long-lived and will naturalise amongst long grass or in wildflower gardens. By growing different varieties of Camassia together in drifts you can ensure the flowering season for these bulbs lasts from May until July.
  • Spread: 30 cm
  • Height: 90 cm
  • Aspect: Full Sun, Partial Shade
  • Soil: Chalky, Clay, Loamy, Sandy (will tolerate most soil types)

Flowering Period:

Cotoneaster horizontalis

File:Bombus terrestris sur Cotoneaster horizontalis.JPG
  • Cotoneaster horizontalis is a fantastic plant to grow as a hedge or train up a wall. It has a characteristic herringbone pattern to its stems, which develop into a decorative basketwork as it matures.
  • It can be grown in both full sun and shade but the neat pink flowers and bright red berries are more prolific in full sun. The flowers are a magnet for bees and the berries are eaten by birds.
  • In the autumn, C. horizontalis has excellent late colour, with its small round leaves turning into a beautiful coppery hue.
  • Spread: 180 cm
  • Height: 50 cm
  • Aspect: Full Sun, Partial Shade
  • Soil: Chalky, Clay, Loamy, Sandy (will tolerate most soil types)

Flowering Period:

Digitalis

Digitalis Purpurea - Free photo on Pixabay
  • Digitalis purpurea or the common foxglove is one of the most beloved cottage garden plant. The tubular, bell-shaped flowers are loved by bees, especially larger bumblebee species such as Bombus terrestris. Most foxgloves are biennial, meaning they put on root and foliage growth in year one, and then flower and set seed in year two, before dying. However there are some perennial varieties.
  • Most foxgloves prefer dappled shade which is similar to the woodland environments they naturally grow in.
  • There are many different types of foxglove available in a variety of shades, here are a few examples:

Digitalis purpurea – the native foxglove. Tall spires of pink dark pink flowers in June and July. Height 2m

Digitalis purpurea ‘Sutton’s Apricot’  – an extremely pretty variety with apricot/pink flowers. Height 1.5m

Digitalis lutea –pale yellow flowers in June and July. A perennial that reaches 60cm in height

Digitalis purpurea ‘Excelsior Group’– biennial plants that offer white, pink or mauve flowers. Height 2m

Digitalis parviflora – small, brown flowers that are tightly packed onto the flower spike. A perennial that flowers from May to July. Height 60cm

Digitalis grandiflora – perennial foxglove with large, warm-yellow flowers. Height 80cm

Digitalis purpurea ‘Illumination Pink’ – an incredibly vibrant foxglove with bright pink flowers with peachy orange centres. Flowers May to August. Height 90cm.

  • Spread: 40 – 50 cm (depending on variety)
  • Height: 60 – 180 cm (depending on variety)
  • Aspect: Full Sun, Partial Shade
  • Soil: Chalky, Clay, Loamy, Sandy (will tolerate most soil types)

Flowering Period:

Most Digitalis cultivars flower from late May to July with some varieties flowering into August.

Echinacea purpurea

  • Echinacea purpurea has star status in the late summer garden. It has wonderful pink, daisy-like flowers with a large, cone-shaped centres. Its perfect for growing in drifts among the border or among grasses and rudbeckias in a prairie-style planting scheme, and is extremely attractive to pollinators. Its flowers are very long-lived and are superb for cutting. There are many different varieties each with its own distinctive height, colour and size of cone.
  • Spread: 50 cm
  • Height: 120 cm
  • Aspect: Full Sun, Partial Shade
  • Soil: Chalky, Loamy, Sandy

Flowering Period:

Geranium ‘Rozanne’

  • Hardy geraniums or Cranesbill are popular perennial border plants that come in shades of pink, purple and blue. They’re easy to grow, thrive in sun and shade and flower for months on end. They offer a long season of pollen and nectar for a number of pollinators, particularly honey bees.
  • Geranium ‘Rozanne’ is one of the most striking of the Cranesbills. It bears beautiful deep purple flowers that contrast perfectly with its mid-green foliage. It’s perfect for ground cover at the front of borders. It was also voted the ‘Plant of the Centenary’ to mark 100 years of the RHS.
  • Spread: 100 cm
  • Height: 60 cm
  • Aspect: Full Sun, Partial Shade
  • Soil: Chalky, Clay, Loamy, Sandy (will tolerate most soil types)

Flowering Period:

Knautia arvensis

See the source image
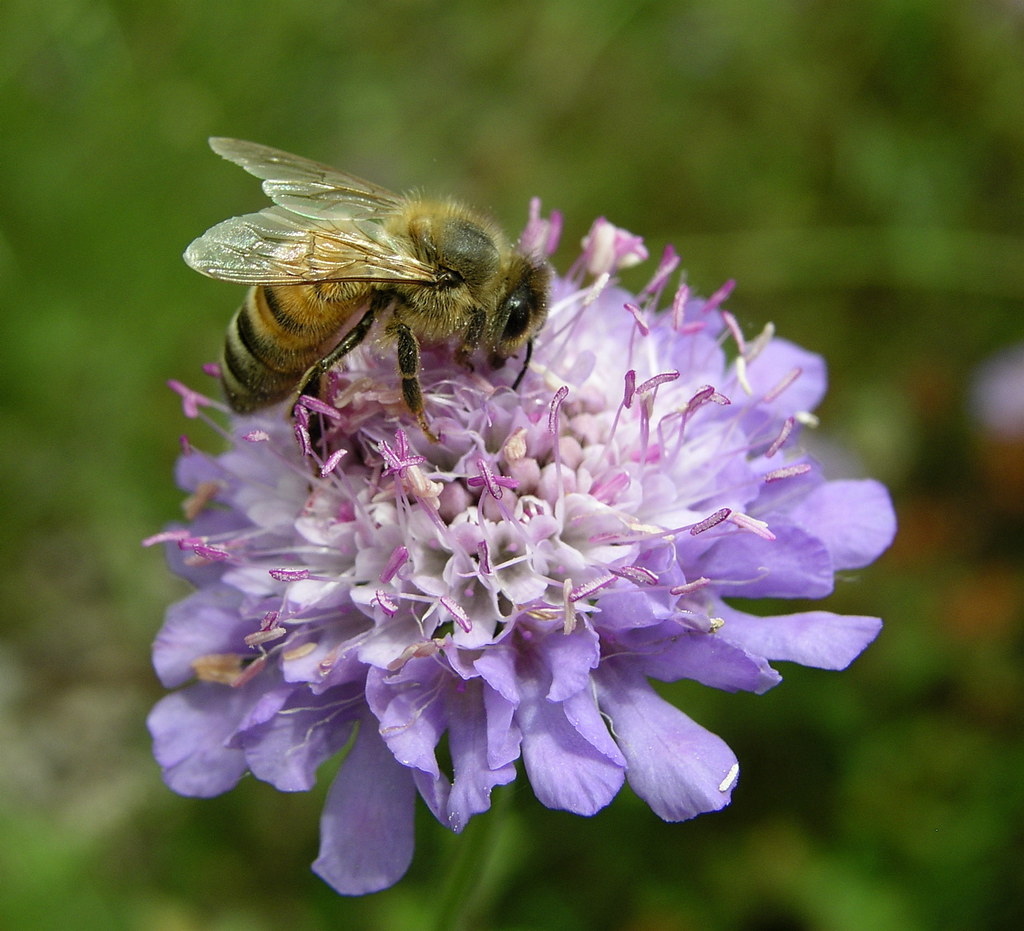
  • Knautia arvensis or the Field Scabious is a beautiful and attractive wildflower. Pale lilac pin-cushion flowers adorn long wiry stems. It’s perfect for the herbaceous border and its blooms are adored by bees and butterflies. It also makes an excellent cut flower.
  • Spread: 40 cm
  • Height: 100 cm
  • Aspect: Full Sun
  • Soil: Chalky, Loamy, Sandy

Flowering Period:

Lavandula ‘Munstead’

See the source image
  • Lavandula angustifolia ‘Munstead commonly known as English Lavender is a Mediterranean evergreen shrub, grown for its fragrant leaves and bee-friendly flowers. These are brilliant plants to grow in wildlife gardens, cottage gardens or even formal gardens. They can be grown in the border, planted as companions to shrub roses or used as a low-growing hedge. They also happily thrive in pots.
  • They love an open site in full sun coping cope very well with drought conditions. They also love a well-drained, neutral to alkaline soil and can cope with temperatures down to about -15°C.
  • Spread: 80 cm
  • Height: 80 cm
  • Aspect: Full Sun
  • Soil: Chalky, Loamy, Sandy

Flowering Period:

Lonicera nitida ‘Red Tips’

  • Lonicera nitida ‘Red Tips’ is, as it’s Latin name suggests, a form of Honeysuckle. However unlike its showier cousins, Lonicera nitida makes for a compact mostly rounded evergreen shrub. It has tiny, broadly ovate, red-flushed, dark green leaves which are noticeably reddish-purple when young, hence the name ‘Red Tips’. It looks remarkably similar to Cotoneaster horizontalis and also makes a fantastic wall shrub. The flowers are quite insignificant, tiny creamy-white affairs dangling vertically down from the branches of the bush. But despite their inconsequential nature, these flowers pack a huge punch, attracting bees in their dozens.
  • Spread: 150 cm
  • Height: 150 cm
  • Aspect: Full Sun, Partial Shade
  • Soil: Chalky, Clay, Loamy, Sandy (will tolerate most soil types)

Flowering Period:

Nepeta

See the source image
  • Nepeta or catmints add that lovely, soft, floppy, gentle touch to cottage gardens and more formal landscapes. There are many varieties to choose from that will suit different sizes of garden. Nepeta racemosa ‘Walker’s Low’ is a larger variety of catmint suitable for larger more countrified gardens. For smaller, more urban gardens Nepeta ‘Chettle Blue’ is a good choice as is the smaller (and wonderfully named) Nepeta x faassenii ‘Purrsian Blue’.
  • All these plants have deep violet blooms which contrast with the fresh green leaves and are immensely popular with bees and other pollinators.
  • Spread: 50 cm
  • Height: 50 cm
  • Aspect: Full Sun, Partial Shade
  • Soil: Chalky, Clay, Loamy, Sandy (will tolerate most soil types)

Flowering Period:

Penstemon

See the source image
  • Penstemons are absolutely invaluable garden plants for the late-summer and autumn border. They have a very long flowering season and are immensely popular with bees. There are many different varieties of penstemon. Some are suited to an alpine garden but the majority are at happiest in the heart of a herbaceous border.
  • If you want instant colour in your late summer border then penstemons are the answer. Plant in groups of three or five for impact, these wonderful plants will flower until the first frosts.
  • There are many different types of penstemon available in a variety of shades, here are a few examples:

Penstemon ‘Sour Grapes’ – stunning, with almost luminous pale purple blooms. Flowers from June to October. Reaches a height of 60cm

Penstemon ‘Andenken an Friedrich Hahn’ (commonly known as ‘Garnet’ ) – Fabulous crimson flowers from June to September with narrow dark green leaves. Height to 75cm

Penstemon ‘Raven’ – Fabulous dark maroon flowers from June to October. Reaches a height of 100cm

Penstemon ‘Osprey’ – Pink and white flowers from June to October. Height of 90cm

Salvia nemorosa ‘Caradonna’

Salvia nemorosa ‘Caradonna’ is a perennial sage which looks wonderful in ornamental borders alongside Geraniums, Penstemon, Achillea and Echinacea. It produces summer-long displays of spiky, nectar-rich flowers and is loved by bees and other insects alike. Plant in sinuous drifts through your perennial border.

  • Spread: 60 cm
  • Height: 75 cm
  • Aspect: Full Sun, Partial Shade
  • Soil: Chalky, Loamy, Sandy

Flowering Period:

Posted by Jonathan Norman in Cut Flowers, Planting Ideas, Pollinator Friendly, Tweeters Flower Show, 0 comments
How to design a border

How to design a border

The Grass is always greener

We have all been amazed by beautiful borders, whether we see them when we visit a great country house or when we admire Monty Don’s garden at Longmeadow or see those incredible show gardens at the Chelsea Flower Show.  Yet when we look at our own borders, we are sometimes less than impressed.

See the source image

Sometimes our attempts to make our gardens beautiful somehow never seem to work. What we plant looks out of place or at worse, sadly dies.

So here to help is a ten step method for creating great borders.

Step 1. Know your garden.

You cannot hope to create a fabulous planting border unless you know the conditions that plants face once they are in your garden. The following list explains what you must consider.

Soil

This is one of the most important things you need to know, to find out your garden’s soil type.

This is a complex subject which deserves a blog post in it’s own right but if you know what type of soil you have you can then choose plants that will thrive there.

See the source image

There are four main soil types:

  • Chalky
  • Sandy
  • Loam
  • Clay

Your own garden soil could be a mixture of these types, a sandy-loam for example.

For more details on soil types have a look at this article from the RHS.

Note: your garden may have different soil types in different areas.  My own garden is predominantly a free-draining sandy-loam, but a I have a spot that has a high clay content and another area that is very sandy indeed.

pH

The pH scale is the measure of acidity and alkalinity in the soil. 

Some plants are happier in different pH conditions.

Rhododendrons prefer acid soils, whilst Lavender, Honeysuckle and Lilac prefer Alkaline soils.

You can measure the PH of your soil using a soil testing kit, or a measuring probe.

Rainfall

How wet does your garden get to be – is it saturated with rain all year or is it a parched desert.

See the source image

Growing thirsty plants in very dry conditions will not be successful unless you are prepared to regularly water them or provide irrigation.

Exposure

Is your garden open to the elements, is it sheltered or a mixture of the two? 

See the source image

Wind exposure causes havoc with plants, it can desiccate leaves, dry the soil or rock the roots.  Even the most sheltered plot can have wind tunnels that cause isolated damage.

Slopes and dips

A sloped garden has its own complications – rainfall may wash away nutrients from the top of the slope and water may run in rivulets and damage plant roots.  At the bottom of the slope or in dips in the garden, water may collect in pools in warmer weather or become frost pockets in the winter.

Light

How much sunlight does your garden and house get and when?,

See the source image

In the Northern Hemisphere the tilt of the earth means that south facing walls or fences get the most sunlight, whilst north facing walls remain in shadow.  This reverses south of the equator.  East and West facing walls area also affected differently.  East facing walls get the morning sun which though bright is still quite cool, West facing walls get the full force of the afternoon sun and can get very hot. 

Away from the walls in the centre of the garden are areas which get sunlight all day these, especially lawns, can become very dry and parched.

As the day progresses certain parts of your garden dip into shadow. In the morning, long shadows are cast from north and west facing walls with the east and south facing walls enjoying the sun. As the day progresses the west facing walls become bathed in light, the east facing walls descend into shadow whilst the south facing wall still remains in the sun. North walls get very little sunlight at all. This also changes throughout the year with longer shadows in the winter and more sunlit areas in the summer.

Temperature

How warm or cold does your garden get and for how long.  In the height of summer when the days are long and warm it is easy to forget the damp and icy conditions of winter.  Tender summer plants can suffer and die in icy conditions.

Right plant, right place

In our gardens most of the plants that we buy end up perishing because they are planted in areas or conditions unsuited for them.

See the source image

A sun loving plant will struggle in the shade, an acid loving shrub such as a rhododendron will suffer in alkaline soil.

This can be countered for example, by growing a shade loving plant in a less sunny area or growing plants that are happy in particular soil conditions.  Similarly it is advisable to grow plants that can tolerate wind in exposed places.

Step 2. Analyse Your Site

Now you know the conditions and issues that can affect your plant you need to make notes on where these problems occur. 

If you are able to, take a year to do a site analysis.  Note things like:

  • The coldest and warmest temperatures and when they occur
  • The average temperature for the month
  • How much rain you get and when?  Does the water collect in dips or troughs.
  • Your soil type – check this every 2m (6ft) or so, you’ll be surprized at the differences from place to place
  • Your soil pH – again check it every 2m
  • Note how much wind you get, when and where does it blow, do you get regular squalls that blow in certain places
  • Finally and most importantly, note the amount of light and shadow your garden receives throughout the year.  Which walls or areas receive the most sunlight and when.  Does the heat cause any issues such as dry and desiccated ground.

Step 3. Make a Plan

Before you consider adding your plants, you need to make a plan of your garden or bed.

This topic is too long for this blog so here is a link to the best online description of how to do it, courtesy of the Oxford College of Garden Design.

Step 4. Understand Form and Structure

Now you have your plan and know what conditions your garden has you can plan the plants and trees that will fill your space. Initially you need to decide on the larger plants that will give your garden form and structure.

Use borrowed landscape

Your neighbours may have trees or shrubs in their garden which may look interesting and are visible from your own site.  Or their may be views to distant hills or woodlands that are worth looking at.  This borrowing of external views can make it easier to design a space.  You can make that beautiful scene or your neighbours fabulous shrub look like they belong in your garden own by creating structured planting that frames or accentuates those views.

Plant Types

Plants come in four main types

  • Trees
    • Any garden no matter how small benefits from a tree or two
    • They are wonderful in so many ways as they can become focal points, attract birds and other animals, block unwanted views and also provide shelter from strong winds
    • They also help connect the garden to the sky, thus making it look bigger
    • Add these plants first in any plan you make
Trees added to a design
  • Structural plants
    • Such as hedges and large shrubs
    • These form the backdrop of your garden
    • Add these next to your plan
Structural plants added to a design
  • Accent plants
    • These are a second layer of structural forms
    • Such as small shrubs and sub-shrubs or larger ornamental grasses
    • These add solidity to your garden
    • Add these after the structural plants
Addition of accent plants
  • And Fillers
    • Sometimes known as the pretties
    • These are the perennials or bedding plants that fill the gaps between your structural planting
    • Add these last.
Filler plants added to the design

Note: The plants in the above diagrams have been added in groups. Grouping plants (in odd numbers) is a great way to get a professional looking planting scheme. It creates a more natural look, is easier on the eye and many plants look better amongst their fellows than they do on their own.

For a little more information on how to create a planting plan have a look at this video from my own garden design tutor: Duncan Heather.

Step 6. Understand Plant Form

Plants come in many different shapes – known as forms. Each of these creates a different effect in the planting sceme.

Rounded, spherical and globular

Machine generated alternative text:
ROUND 
THE 
FORM
  • These are common shapes, together with domed and mounded plants form the basis of most mixed plantings
  • Clipped globular forms (i.e. buxus balls)
    • Bold and eye catching
    • Make good focal points
      • Act as visual full stops in a border
    • Spaced equidistantly (often in pairs) they
      • Accentuate design geometry and
      • Can also frame views
  • Rounded trees can be used in avenues
    • Single specimens become focal points – noticeable from a distance
Example plants
  • Hebe ‘Emerald Gem’
  • Sorbus aria
  • Cercis candanensis
  • Hydrangea arborescens ‘Annabelle’
  • Buxus sempervirens

Domed and mounded

Machine generated alternative text:
DOME OR 
HUMMOCK 
FORM
  • Along with rounded forms, domes anchor most planting schemes and act as contrasts to more dynamic shapes
  • Most common plant form found in nature
    • Can be used to blur boundaries between garden and landscape
    • Use domed or bell shaped trees and shrubs often throughout your garden

Example plants

  • Viburnum davidii
  • Pittosporum tobira ‘Nana’
  • Crataegus monogyna

Conical and pyramidal

Machine generated alternative text:
THE 
CONICAL 
FORM
  • Natural shape of conifers and many young trees
  • Combine well with rounded and domed forms
    • Provide a subtle contrast to the other plant forms
    • Are formal, distinctive and weighty
    • Give height and draw the eye upward
Example plants
  • Liquidambar styraciflua
  • Betula pendula
  • Chamaecyparis lawsoniana
  • Carpinus betulus ‘Fastigiata’

Spiky

Lesson 3: Drawing Plants | Plant drawing, Vine drawing, Realistic drawings
  • These plants create bold and interesting shapes
  • As they’re common to hotter climates
    • They go well with
      • Formal Mediterranean,
      • Gravel and
      • Tropical designs
  • Contrasting with rounded or domed forms, make good secondary focal points.
  • Can be very dramatic plants (for example, palms) but don’t overdo them
Example plants
  • Yucca filamentosa
  • Trachycarpus fortunei
  • Phormium tenax
  • Agarve americana

Columnar and ovoid

Machine generated alternative text:
COLUMNAR OR 
CYLINDRICAL 
FORM
  • Distinctive tall fastigiate trees and shrubs
    • Make dramatic focal points
    • Great in isolation
    • Less good in groups or spaced equidistantly
    • Pencil-like forms are more assertive

Note: Fastigiate means having the branches more or less parallel to the main stem

Example plants
  • Taxus baccata ‘fastigiata’
  • Juniperus scolpulorum ‘Skyrocket’
  • Ilex crenata ‘Fastigiata’

Vase and Fan

THE 
FAN 
FORM
  • Vase shaped plants come in two varieties
    • Broad
      • These are graceful partners to other plants
      • Use freely amongst your planting
    • Narrow
      • Attracts the eye
      • Good focal point if used individually
      • Can be grouped together but loses the dramatic effect if you do so
  • Vase shaped trees
    • Easiest to walk under
    • Can create an informal arch if on opposite sides of a path
Example plants
  • Miscanthus sinensis ‘Flamingo’
  • Mattuccia struthiopteris
  • Stipa tenuissima

Square

Machine generated alternative text:
TRAINED OR 
CLIPPED 
FORM
  • These are not natural forms and are created by:
    • Clipped hedges,
    • Pleached trees and
    • Topiary cubes
  • They are striking and formal
  • Enhance rectilinear design layouts
  • Provide tailored presence against billowing grasses and perennials
Example plants
  • Clipped Taxus baccata
  • Buxus sempervirens

Irregular

Machine generated alternative text:
QUIRKY OR 
UNPREDICTABLE 
FORM
  • Amorphous and loosely shaped plants which cannot be categorised
  • They play a supporting role in the planting and contrast well with strong architecture
Example plants
  • Cotinis coggygria
  • Rhus typina
  • Aesculus parviflora

Step 7. Understand Flower Form

Flowers come in many varieties and forms. How these combine together can make a border look wonderful. Amongst these are the herbaceous perennials which can change shape dramatically throughout the year.

There are six universally accepted flower categories as devised by Piet Oudolf and Nöel Kingsbury.

Spires

Foxglove, (Digitalis purpurea) Seed - 0.1g Seed Packets | Shepherd Seeds

Perform like columnar trees and shrubs

  • Sparsely spaced single stemmed perennials can be very theatrical
  • More delicate multi-branched spires have great impact planted in groups

Examples plants

  • Digitalis purpurea
  • Digitalis parviflora
  • Veronicastrum virginicum

Buttons and Globes

Echinops ritro 'Veitch's Blue' (Globe Thistle)
  • Perennials with globular flowers
    • These contrast well with spires and grasses
    • Less visually attesting than other flowers
      • But very eye-catching

Example plants

  • Echinops ritro
  • Astrantia major

Plumes

Thalictrum delavayi (Chinese Meadow Rue)
  • Airy and cloud-like plants
    • Act as mounded plant forms
  • Help soften the look of the border
    • Plant in large groups for impact

Example plants

  • Thalictrum delavayi
  • Panicum virgatum

Umbels

Ammi majus - BBC Gardeners' World Magazine
  • Rounded or plate-shaped flowers
    • Similar aspect to domed shrubs
  • Have a calming effect on pencil like flower forms
    • Ground the eye with a natural look

Example plants

  • Selenium wallichianum
  • Foeniculum vulgare
  • Ammi majus

Daisies

Echinacea purpurea 'Magnus' | Stonehouse Nursery
  • These are the commonest and most natural of flower forms
    • These flowers play a supporting role
    • Position at fore to mid border

Example plants

  • Echinacea purpurea ‘Magnus’
  • Symphyotrichum novi-belgii

Screens and Curtains

Verbena bonariensis - Wikipedia
  • Light and lacy plant forms which
    • Allow you to look through them to the planting beyond and
    • Encourage the eye to investigate what’s beyond

Example plants

  • Verbena bonariensis

Step 8. Understand Colour

Colour Wheel 
Red-violet 
Violet 
Blue-violet 
Blue 
Blue-green 
Green 
Red 
Yellow-green 
Red-orange 
Orange 
Yellow-orange 
Yellow

Above is an image of the colour wheel. Use this to create planting schemes with that wow factor.

Colour Categories and Combinations

The colour wheel is split into different categories

Primary colours

  • Red
  • Yellow
  • Blue

Secondary colours

  • Mixture of primary colours
    • Orange = Red + Yellow
    • Green = Yellow + Blue
    • Violet = Red + Blue

Tertiary colours

  • Mixture of the primary and secondary colours
    • Red – Orange
    • Orange – Yellow
    • Yellow – Green
    • Blue – Green
    • Blue -Violet
    • Red – Violet

Hues, Tints , Shade and Tones

  • Each of the primary, secondary and tertiary colours can be further segmented using hues, tints shades and tones these being:
    • Hue – a colour
    • Tint – any colour plus white
      • i.e. lilac = violet + white
    • Shade – any colour plus black
      • i.e. navy blue = blue + black
    • Tone – any colour + grey
      • i.e. gold = yellow + grey

Colour combinations can be broadly grouped into two main types

  • Harmony and
  • Contrast

Harmony uses adjacent colours

Contrast uses opposite colours on the wheel

Harmony

Here are some examples of using harmonious colour schemes

Monochromatic

  • These use different shaded tints of only one colour (+ green)
    • The look is bold and sophisticated
    • Suits formal or crisp modern designs

Analogous

  • Also called harmonic planting
  • Uses colours that are adjacent to each other on the colour wheel
    • i.e. Red, Violet-red and Blue-orange
  • Each colour shares similar pigments and creates a natural looking and pleasing scheme
  • Choose one colour to dominate with a second as support and third (or fourth) colours as accents to draw the eye

Contrast

Complementary

  • These combinations use colours opposite each other on the colour wheel
    • This creates maximum contrast
    • Lively, sometimes electric combinations
      • Especially if the colours are at full intensity
    • Eye catching
      • Use sparingly as focal points
      • Combinations can be accentuated with
        • Coloured walls or pots
    • There are six complementary partnerships
      • Red and Green
      • Yellow and Purple
      • Blue and Orange
      • Red-Orange and Blue Green
      • Yellow-orange and Blue Violet
      • Yellow-Green and Red-Violet
    • Two of these are considered below

Yellow and Purple

  • Most attention grabbing complementary combination
    • Yellow having the highest visual energy of all colours

Red and Green

  • Red always contrasts against the green of foliage
    • If there is a large array of green, red flowers pop like jewels
  • To accentuate what could be a (slightly) boring combo, add red-violet and red violet with green or
    • Blue-green and blue-yellow with red (both triadic combinations)

Triadic

  • Uses colours spaced equidistantly on the colour wheel
    • i.e. Blue-green, red-violet and yellow orange
  • Intense colour selections lead to vibrant displays
  • More muted colours lead to relaxing pastel combinations
  • Green is usually the common but recessive colour with
    • The two other colours added for contrast

Polychromatic

  • A scheme made from the mixture of many colours plus their tints, tones and shades
  • Very lively effect – even with pastel shades
  • Choose colours with the same intensity
    • Avoid mixing pastels and saturated hues
  • Work best in naturalistic combinations

For a further look at colour in the garden please read Sue Gaviller’s incredible 9 part deep dive into plant colour theory:
Part 1, Part 2, Part 3, Part 4, Part 5, Part 6, Part 7, Part 8 and Part 9

Step 9. Put it all together

There are nine golden rules of planting

Rule 1. Keep it simple

  • Less is more
    • Don’t be tempted to plant all your favourites in the same place
    • Leads to a bitty, chaotic display
  • Reduce the number of plants and
    • Plant the remainder in larger masses

Rule 2. Widen the border

English Herbaceous Garden Border Stock Photo, Picture And Royalty Free  Image. Image 10908754.
  • The larger the border the better
    • You can fit a larger range of shrubs, perennials and bedding plants.
  • This can work in smaller gardens that are limited for space
    • Avoid the thin border around the edges
    • Maybe try a large border one side and climbers and containers the other
    • This balances the garden, allows for a deeper planting but does not eat into people space
  • Consider sacrificing a lawn for more plants

Rule 3. Scale and Proportion

  • Consider the size of the garden you are planting in, the buildings that surround it and the areas to be planted
  • Try and work with plants that are in proportion to your garden
  • Avoid plants that grow too big or arrangements that look too small
  • Notably large gardens need large borders with larger plants or smaller plants arranged into bigger groups
  • In smaller spaces, height is needed from taller plants but be careful to limit the number of such plants otherwise it makes the garden claustrophobic

Rule 4. Unity

Acres Wild Award Winning Designers
  • This is the sense of togetherness of the design
    • For example, If the garden overlooks the countryside, use similar plants, colours or forms in the garden as those seen in the view
  • Site characteristics will determine what works well.
    • For example, if the surrounding area is more open and wind-swept then a prairie style of planting may suit the garden.
  • Try and work with the landscape not against it.

Rule 5. Repetition

Unify planting by repeating plants with similar shapes or colours, these appeal to the eye and make connections that bring order out of the chaos

Popular reliable choices are:

  • Evergreen perennials
  • Grasses
  • Topiary

Rule 6. Rhythm

  • Rhythm in planting occurs when plants are repeated throughout the border or organised into sweeping drifts. Borders look better if the plants are organised in a distinct repeating patterns especially if these create change in height.
  • The larger the planting area, the more rhythms appear in it.

Rule 7. Harmony and Variety

  • Repetition of plant forms gives harmony but too much of the same thing over a large area can become boring. For example if the plants are the same colour. Variety adds the necessary spice.
  • Add plenty of different plants.
    • Different plant forms contrast with each other – leaf textures are most notable here.
    • Try combining large leaved plants with plants who have medium sized leaves.
    • Or medium leaves with finer leaf textures.
    • Variation creates interest and harmony.
  • Similarly combine large flowers amongst smaller blooms
    • Especially if the flower shapes and colours are different.
    • This contrast of forms creates a subtle variety.
  • Beware: Distinct opposites will scream for attention – good if you want to create a focal point but uncomfortable if this is repeated throughout the entire border.

Rule 8. Focal Points

Acer griseum (Paperbark Maple)

All gardens need focal points. These can be:

  • Plants,
  • Sculpture,
  • Furniture or
  • Views

Smaller gardens need at least one major focal point whilst larger gardens need more.

If you choose plants as focal points they need to have a strong visual energy, for example a distinctive shape.

Primary, Secondary and Tertiary focal points

Primary or larger focal points, like a tree, draw the eye from a distance and tempt you to explore the space around them. Up close the tree becomes a backdrop so you will need have a set of secondary focal point to draw they eye once you are there. Also include plenty of smaller scale accents or tertiary focal points in the border to add interest when you are looking at the planting up close.

Rule 9. Balance

  • This is the state or equilibrium between elements in the garden
  • A counter example may illustrate this best.
  • The planting of large evergreens on one side of a path and nothing on the other looks odd and badly balanced.
  • Central axis planting is the easiest way to achieve balance, one side of a path can balance the other. This can be done by creating a mirror image on either side of the central axis or by adjusting the planting into an asymmetrical balance.
  • Volume balancing is another method. One large shrub can be balanced by a group of 5 smaller shrubs.
  • It is a bit of an intuitive thing. If it feels right, it probably is.

Step 10. Plant Research

All the above tips and rules will not work unless you know the details of the plants and trees you hope to add to your garden. Do your research look for the type of plants that you want to use and check if they will work in your garden.

There are a number of online resources that I like to use myself for plant research these being:

Larger online nurseries are also useful sources of information, notably

Further Reading

Three books I can’t do without

365 Days of Colour In Your Garden: Amazon.co.uk: Nick Bailey:  9780857832696: Books

365 Days of Colour by Nick Bailey

How to plant a garden by Matt James

Complete Planting Design Course: The definitve planting design course:  Amazon.co.uk: Thomas, Hilary, Steven, Wooster: 9781845334123: Books

The Complete Planting Design Course by Hilary Thomas

Out of print, rare as hens teeth but worth it’s weight in gold
Copies are still in circulation but are very expensive due to its rarity

Posted by Jonathan Norman in Planting Design, Planting Ideas, 0 comments
Clematis Care

Clematis Care

Why Grow Clematis

Clematis plant are some of the most versatile blooms that you can grow in a garden.

Because they are climbers you can pretty much grow them anywhere as long as they have something to cling onto. This could be:

  • A trellis or wall panel
  • An obelisk, wigwam or climbing frame
  • Another plant

They take up almost zero ground space but will need room for the stems to grow and flourish. They are also one of the most satisfying plants to grow, beautiful blooms in a myriad of shapes sizes and colours which just add that wow factor to your garden.

This image has an empty alt attribute; its file name is PrincessDiana-1024x660.jpg

Types of Clematis

Clematis is a large group of plants which belong to the Ranunculaceae family. There are over 300 species and hundreds of hybrids. For the average gardener, Clematis varieties can be divided into eight separate groups. These in turn are organised into two main divisions, the Large Flowering and Small Flowering species.

Large Flowering Clematis

These varieties are typically characterized their large, dramatic flowers, which are sadly, rarely scented. The roots of these plants are lace-like in appearance.

These Clematis plants are unfortunately prone to the fungal disease known as wilt.

Early Large-Flowered Group

This image has an empty alt attribute; its file name is 20170604_202304-1-1024x993.jpg
  • The flowers of this group are incredibly large, often 15-25 cm (6-10 in) across. These are star-shaped and may be single or semi-double blooms
  • Flowers come in a wide variety of colours, usually bloom in two waves initially late spring or early summer, then likely repeat flower in late summer and early autumn
  • Pruning Group 2
  • Notable Varieties
    • Clematis ‘Diamantina’
    • Clematis ‘Nelly Moser’
    • Clematis ‘The President’

Late Large-Flowered Group

This image has an empty alt attribute; its file name is Clematis%20Ville%20de%20Lyon2.jpg
  • Their flowers are impressively large, 13-20 cm (5-8 in) across usually star-shaped, in single, semi-double or double blooms
  • These clematis can reach up to 2-3.5 m (6-12 ft) in height
  • They usually bloom in two waves, early and mid summer on new wood, often repeat flowering again in late summer and early autumn
  • They are usually full sun or partial shade tolerant
  • The foliage of some of these clematis is susceptible to powdery mildew
  • Pruning group 3.
  • Notable varieties
    • Clematis ‘Ernest Markham’
    • Clematis ‘Perle d’Azure’
    • Clematis ‘Ville de Lyon’

Small Flowering Clematis

Small flowered Clematis are usually characterized an abundance of small flowers, which are often scented. The roots of the plant are fibrous in appearance. These plants are easy to grow and the foliage rarely suffers from wilt.

This main Clematis group is subdivided into six distinctive sub-groups each presenting very different sets of qualities.

Atragene Group

This image has an empty alt attribute; its file name is OIP.RFxhtap8rezPB2rjk-GfFAHaFj
  • This group of clematis contain varieties that are extremely hardy, undemanding and easy to grow
  • They’re also cold-hardy so can be grown on north and east facing walls
  • Profuse bloomers from mid to late spring and occasionally in late summer
  • The flowers produce ornamental, fluffy and silky seed-heads, which remain on the plant, adding further interest
  • They are gentle plants and do not smother their supporters
  • Pruning Group 1
  • Notable varities
    • Clematis ‘Pamela Jackson’
    • Clematis ‘Frankie’
    • Clematis ‘Markham’s Pink’

Clematis – Evergreen Group

This image has an empty alt attribute; its file name is 36370cv.jpg
  • The earliest Clematis to flower, the Evergreen group includes small-flowering clematis which provide gardeners with floral interest in winter
  • Blooming from midwinter onward lowering at a time when the garden has little to offer
  • Transform boundary walls and fences into leafy screens, the evergreen foliage remains handsome all year-round and providing multi-season interest
  • Pruning Group 1
  • Notable varities
    • Clematis ‘Apple Blossom’
    • Clematis cirrhosa var. balaerica

Herbaceous (or Integrifolia) Group

This image has an empty alt attribute; its file name is Q056XIjfAb8LeUX0JZGt0Bc0hFd3lm5Kt578cQjB.jpeg
  • This group contains easy to grow and long lived plants, these clamber over other plants in the border
  • They have no twining leaves (petioles) to help them climb and die to the ground at the end of each year
  • They bloom profusely over a long season, from early summer to early autumn, with the bonus of attractive foliage
  • Deadhead them after their first flush of blooms, they will bloom again within 30-45 days. You may enjoy 2 or 3 waves of colourful blooms
  • Pruning Group 3
  • Notable varieties
    • Clematis ‘Arabella’
    • Clematis x durandii
    • Clematis ‘Juuli’

Clematis – Montana Group

This image has an empty alt attribute; its file name is ggg-1024x576.jpg
  • The Montana group of clematis are the most vigorous of clematis varieties
  • Their flowers are but they are full of charm, fragrant and create an abundant and spectacular floral display
  • Strong growers, they’re great for arbors, trellises, pergolas and other garden structures. These need to be sturdy as these plants can get very big
  • Pruning Group 1
  • Notable varieties
    • Clematis ‘Elizabeth’
    • Clematis montana var. grandiflora
    • Clematis montana var. rubens

Clematis – Orientalis Group

This image has an empty alt attribute; its file name is yP9ab8YWUf7fOghXU7PFGOgzGvGNxLHcWpUHnSjV.jpeg
  • Originating from central Europe and Asia, this group comprises of species with bright yellow lantern or star-shaped flowers that are often nodding.
  • They bloom profusely from mid to late summer, even into late autumn.
  • Once the floral display is over the flowers are replaced with showy pom-pom like seed-heads.
  • Pruning Group 3
  • Notable varieties
    • Clematis ‘Bill MacKenzie’
    • Clematis serratifolia
    • Clematis tangutica

Clematis – Viticella Group

This image has an empty alt attribute; its file name is NKK4mMdyMwbrYOgkX0pQk1r1GM4yzokXrLyy8LiR.jpeg
  • This group of clematis originates from Southern Europe and produces varieties that are durable, easy-care, vigorous and free-flowering
  • They bloom profusely over a long period extending from midsummer to autumn
  • They can be grown in large containers if give enough room enough to grow and something to climb on
  • Pruning Group 3
  • Notable varieties
    • Clematis ‘Etoile Violette’
    • Clematis ‘Polish Spirit’
    • Clematis ‘Princess Diana’

Planting

It’s best to plant in early spring or mid autumn as it is warm and the soil is moist. This helps to establish good root development for your plant.

Avoid planting in waterlogged, frozen or drought inflicted soil.

Choosing a clematis

You are likely to purchase a clematis from a garden centre, nursery or even a supermarket. Always look for plants that have healthy foliage, a multitude of stems and have a good number of flower buds on them. I generally avoid plants that are already full of flower as you are likely to damage them when planting the specimen.

These plants are quite delicate, keep them securely fastened in your car when taking them home.

Preparing the site

  • Most clematis will comfortably grow in sun or partial shade, but avoid a very shady spot. Herbaceous varieties need to be in full sun.
  • Some varieties which include evergreen winter and spring-flowering specimens will need a sheltered spot.
  • Clematis need to keep their roots cool and moist, consider this when you work out your planting area.
  • Allow enough space for your plant to grow into as some clematis are very vigorous.
  • Herbaceous clematis are best grown through plant supports or into nearby shrubs
  • Climbing varieties will need something to cling onto such as a trellis, arbour, obelisk or panel.

Preparing the Plant

Before you plan the clematis, soak the root-ball in water for 30 minutes before you plant it.

Clematis are tolerant of most soil types but if you have sandy or clay soils dig in some organic matter to help improve the soils structure. Dig a hole twice as wide as the root-ball but depth will vary depending on the clematis type chosen.

If planting against a wall or fence, dig the planting hole so that the root-ball will sit around 20 to 30cm (8 to 12in) away from the wall, further out if there is an overhanging. Use a bamboo cane to help the plant reach its permanent support.

For large-flowered hybrid cultivars (early and late-summer-flowering) make sure the top of the root-ball is 5-7.5cm (2-3in) below the soil surface. This encourages new shoots to grow from below ground level, it also helps the plant to recover from Clematis wilt.

Plant all other clematis types with the root-ball just below the soil surface.

Clematis love to gave their heads in the sun and their feet in the shade

Try and plant the roots in a shady area if possible, if not add stones around the roots to protect them from the heat.

Clematis bought from garden centres come pre-attached to bamboo canes and secured by plastic ties. These will need to be very carefully removed before attaching the vine to its support.

Most Clematis (with the exception of Herbaceous varieties) will naturally attach themselves to their supports with their twining leaves (petioles). You can also tie the stems to their supports but be careful not to damage the delicate stems. I usually create a loose loop with garden wire to support the stem without squashing it.

Pruning

There’s an old saying regarding clematis:
“If it flowers before June, don’t prune”

The above quote is a really good guide if you are unsure of your clematis type.

  • If it flowers before early summer (June), leave it alone.
  • If it flowers from late June onwards, prune the plant in late February.

If you do know your Clematis type then you can find out which of the following three pruning groups it fits in.

Group 1

  • Officially these clematis shouldn’t need pruning however, as the plants get bigger they become more unwieldy
  • Regular pruning of clematis encourages strong growth and flowering and keeps the plant in check otherwise they become mass of tangled stems.
  • Prune your plants after they have flowered cutting back by up to one third. Always remember to cut to a healthy pair of buds.

Group 2

  • Prune in late winter or early spring (February)
  • Removing dead or weak stems before growth begins. Check each stems from the top down until you reach a pair of healthy buds, and cut just above them.
  • Avoid heavy pruning otherwise flowers may be lost
  • To encourage a second flush of flowers, prune back some stems by cutting to large buds or a strong side shoot immediately below the blooms.

Group 3

  • In February or March, cut back all the old stems to the lowest pair of healthy buds 15-30cm (6in-1ft) above soil level
  • If left unpruned, this group continues to grow and becomes top heavy
  •  If you have space, leave the plant to scramble over pergolas or walls
  • Note: Herbaceous Clematis can be cut back to near ground level

Diseases

Clematis Wilt

  • Clematis wilt is a fungal disease of clematis which mostly affects the large-flowered hybrid cultivars. The fungus causes rapid wilting and, in severe cases, can kill the whole plant
  • Leaves will have discoloured black spots and show marked drooping
  • If the wilting stems are carefully removed and cut back to a set of healthy leaves the plant will survive. Be careful to dispose of the diseased stems as these can infect other plants

Clematis Slime Flux

  • This is a nasty disease. Where Clematis wilt usually affects the odd stem, Slime flux will affect the whole plant.
  • The disease is characterised by a horrible slimy, crusty, smelly ooze coming from the stems
  • It is likely to be fatal to the plant, but it can be saved if you cut away all the stems affected by the infestation. If you are lucky new shoots will appear in the un-affected areas.

Feeding and Watering

  • Clematis are thirsty plants, they don’t like to dry out and can become prone to drought stress.
  • In hot spells keep them regularly watered – especially if they are in a container
  • Feed them with a Potassium rich fertiliser, a rose fertiliser, for example, is very good
  • Apply a layer of Mulch after feeding such as well-rotted manure, leaf mould or garden compost, to improve the soil and help conserve moisture
  • Feed container-grown clematis monthly during the spring and summer using a general-purpose liquid fertiliser.

Posted by Jonathan Norman in Clematis, Gardening Jobs, Plant Care, Planting Ideas, 0 comments